Overview
The Projects module is the central workspace for the Web Application Scanner (WAS)**.Each project contains its own set of API endpoints, vulnerabilities, scanning configuration, crawler rules, and transformed requests.
You must create a project before performing scans, importing traffic, or viewing vulnerabilities.
Overview
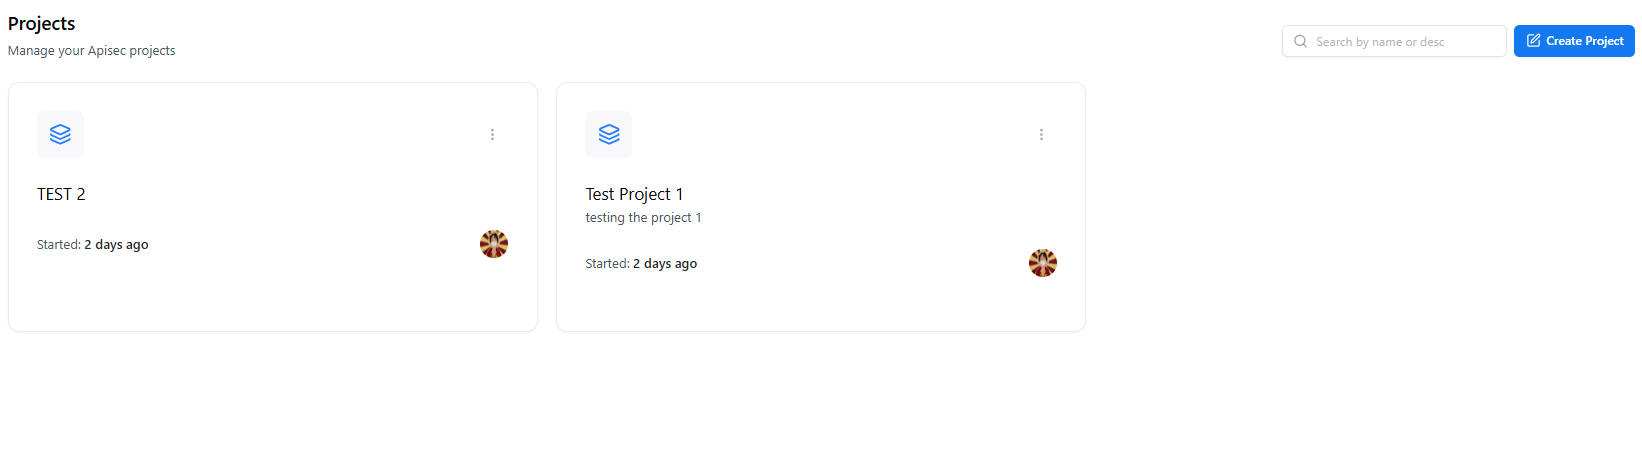
The Projects page displays all WAS projects along with:- Project name
- Description
- Started date
- Owner
- Quick actions
Creating a Project
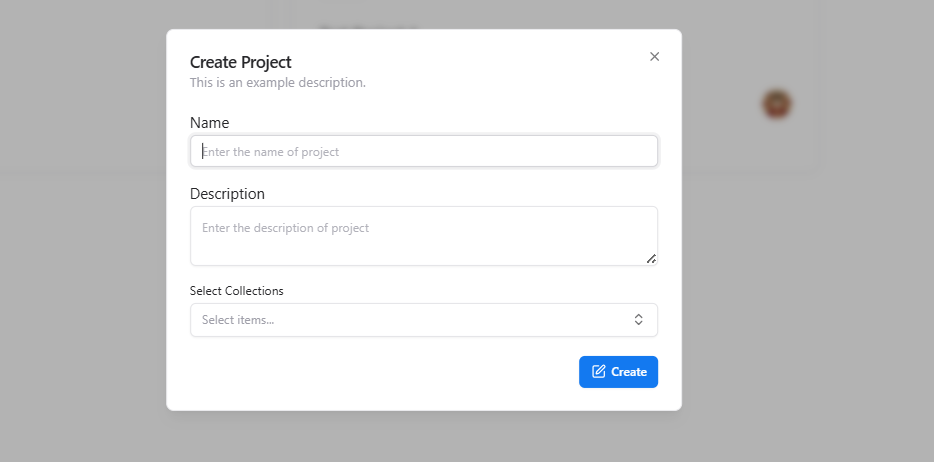
- Click Create Project.
- Enter the project Name.
- Add a Description (optional).
- Select relevant Collections (if applicable).
- Click Create to generate the project.
Project Workspace
Selecting a project opens the full Project Workspace, which contains multiple sections: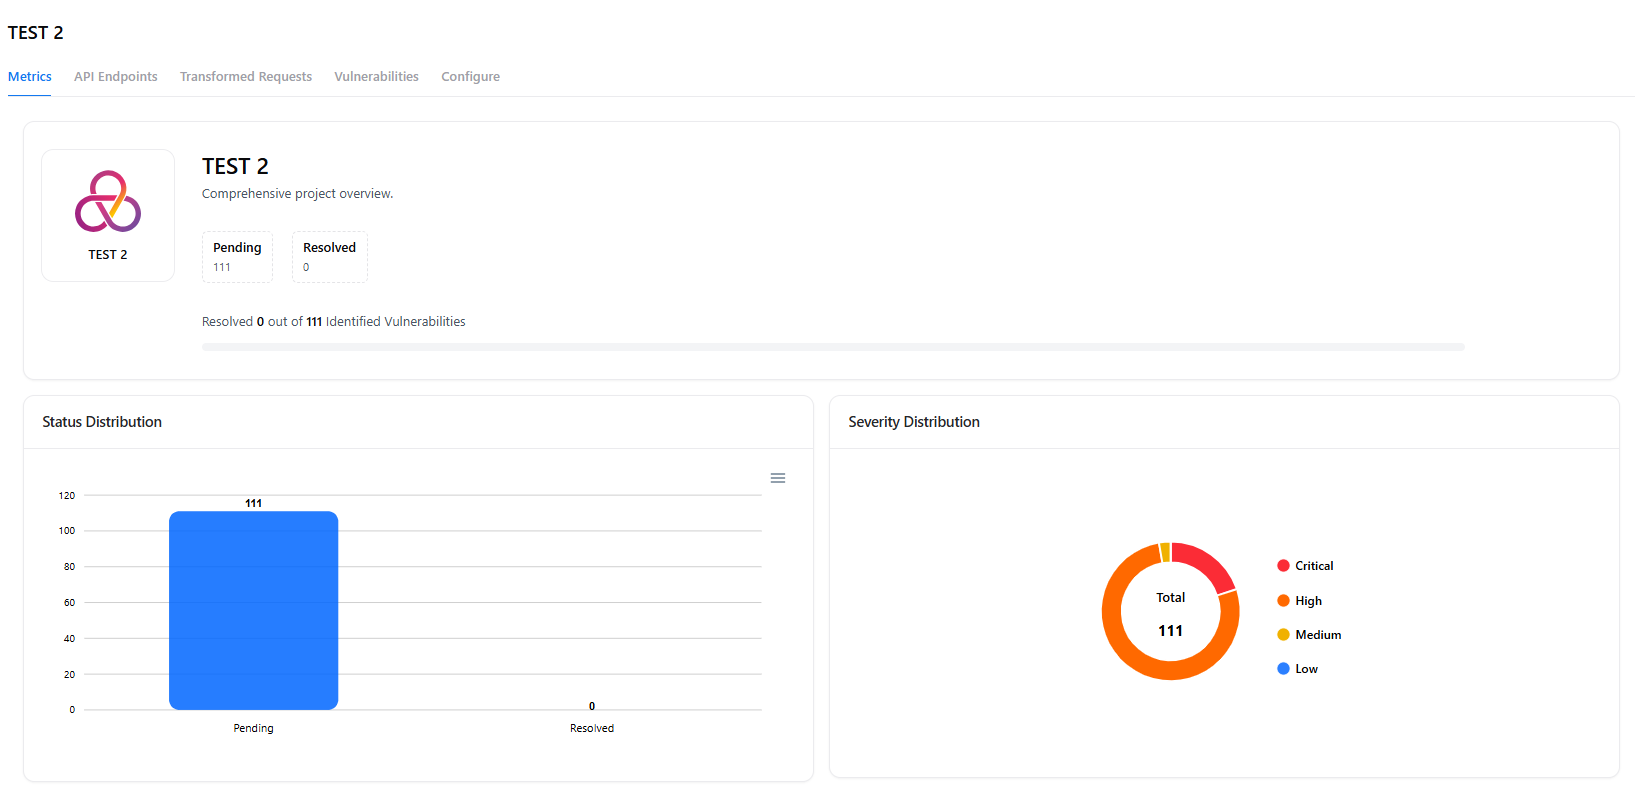
- Metrics
- API Endpoints
- Transformed Requests
- Vulnerabilities
- Configure
- Crawler Settings
📊 Project Sections
Metrics
The Metrics tab provides project-wide insights:- Pending vs resolved vulnerabilities
- Severity distribution (Critical / High / Medium / Low)
- Total identified vulnerabilities
- Visual charts for status and severity
API Endpoints
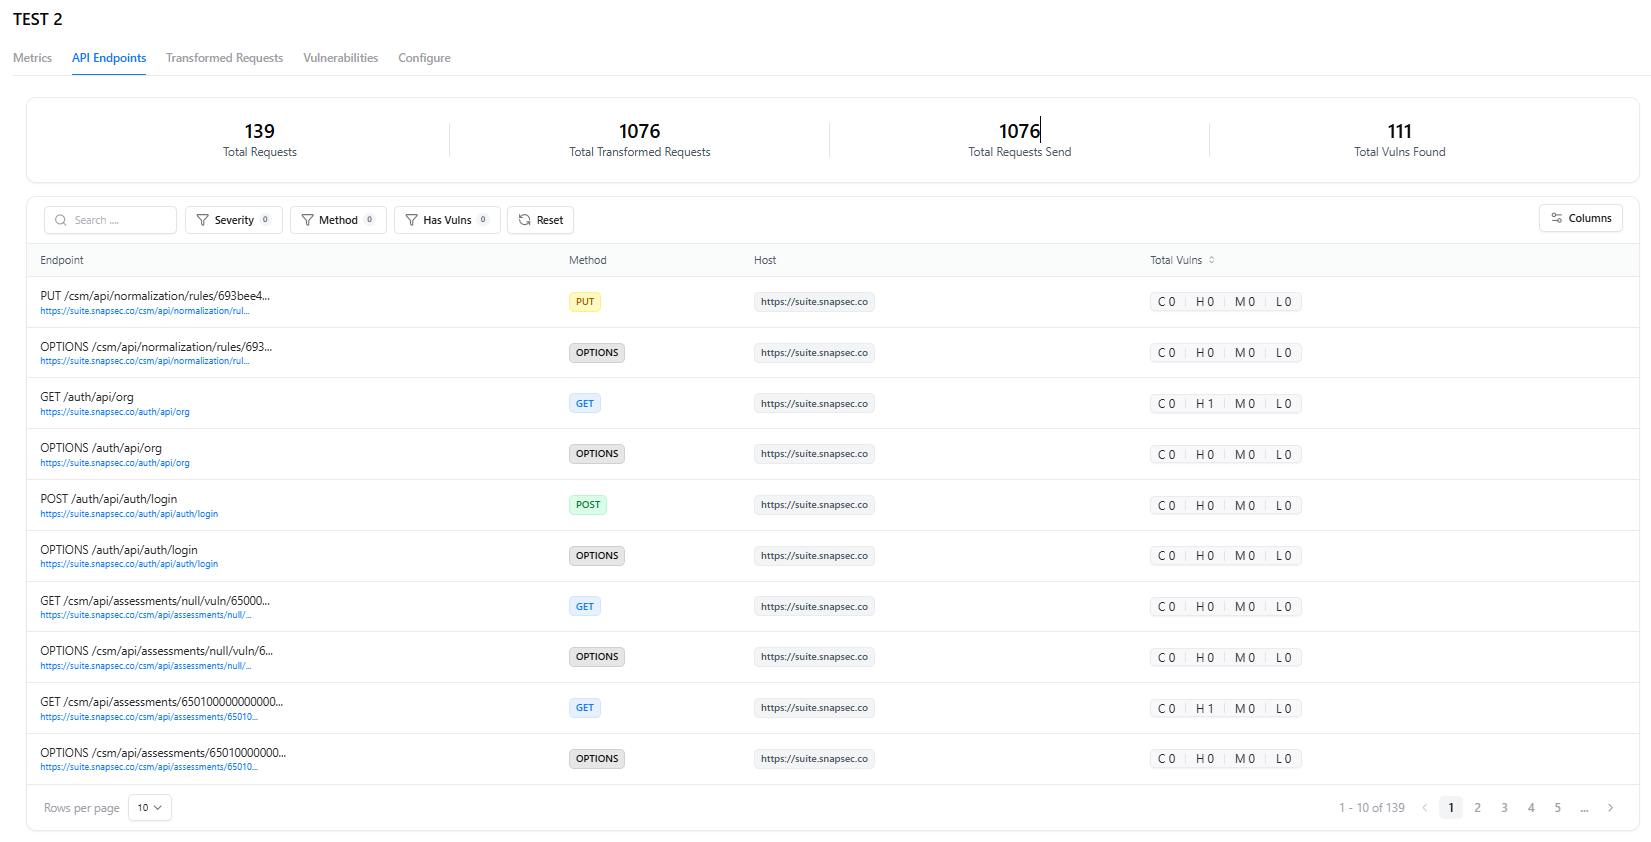
- HTTP Method
- Host
- Path
- Total vulnerabilities for that endpoint
- Filters (severity, method, has vulnerabilities, etc.)
Transformed Requests
- Endpoint
- Method
- Host
- Vulnerability summary
Vulnerabilities
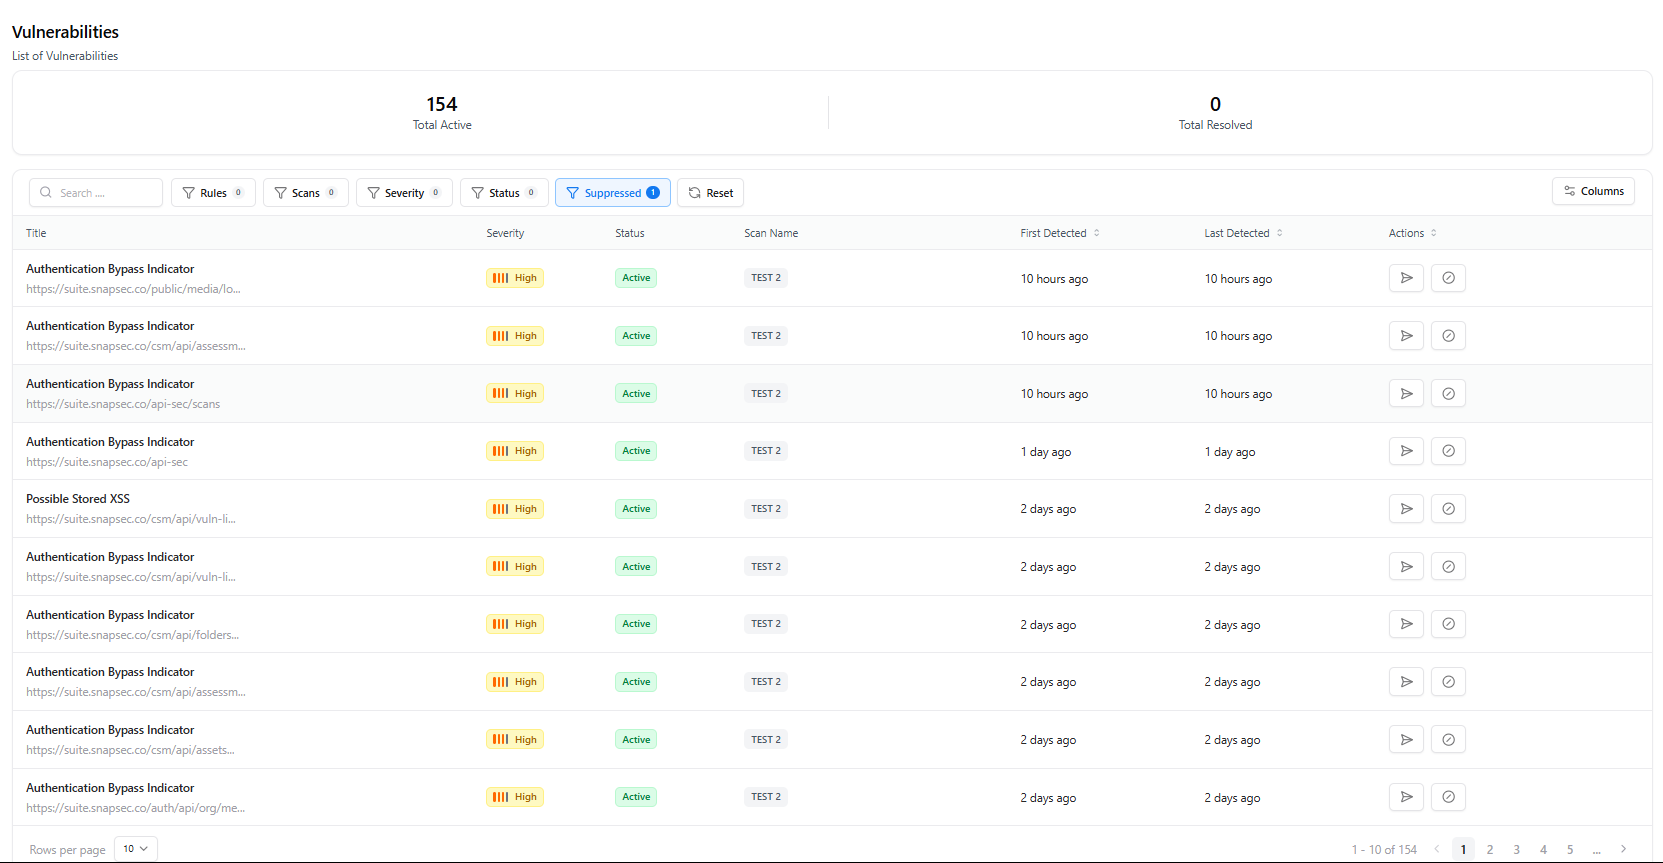
- Vulnerability Title
- Status (Active, Suppressed)
- Scan Name
- Severity
- First Detected / Last Detected
- Quick Actions (view, suppress, etc.)
Configure
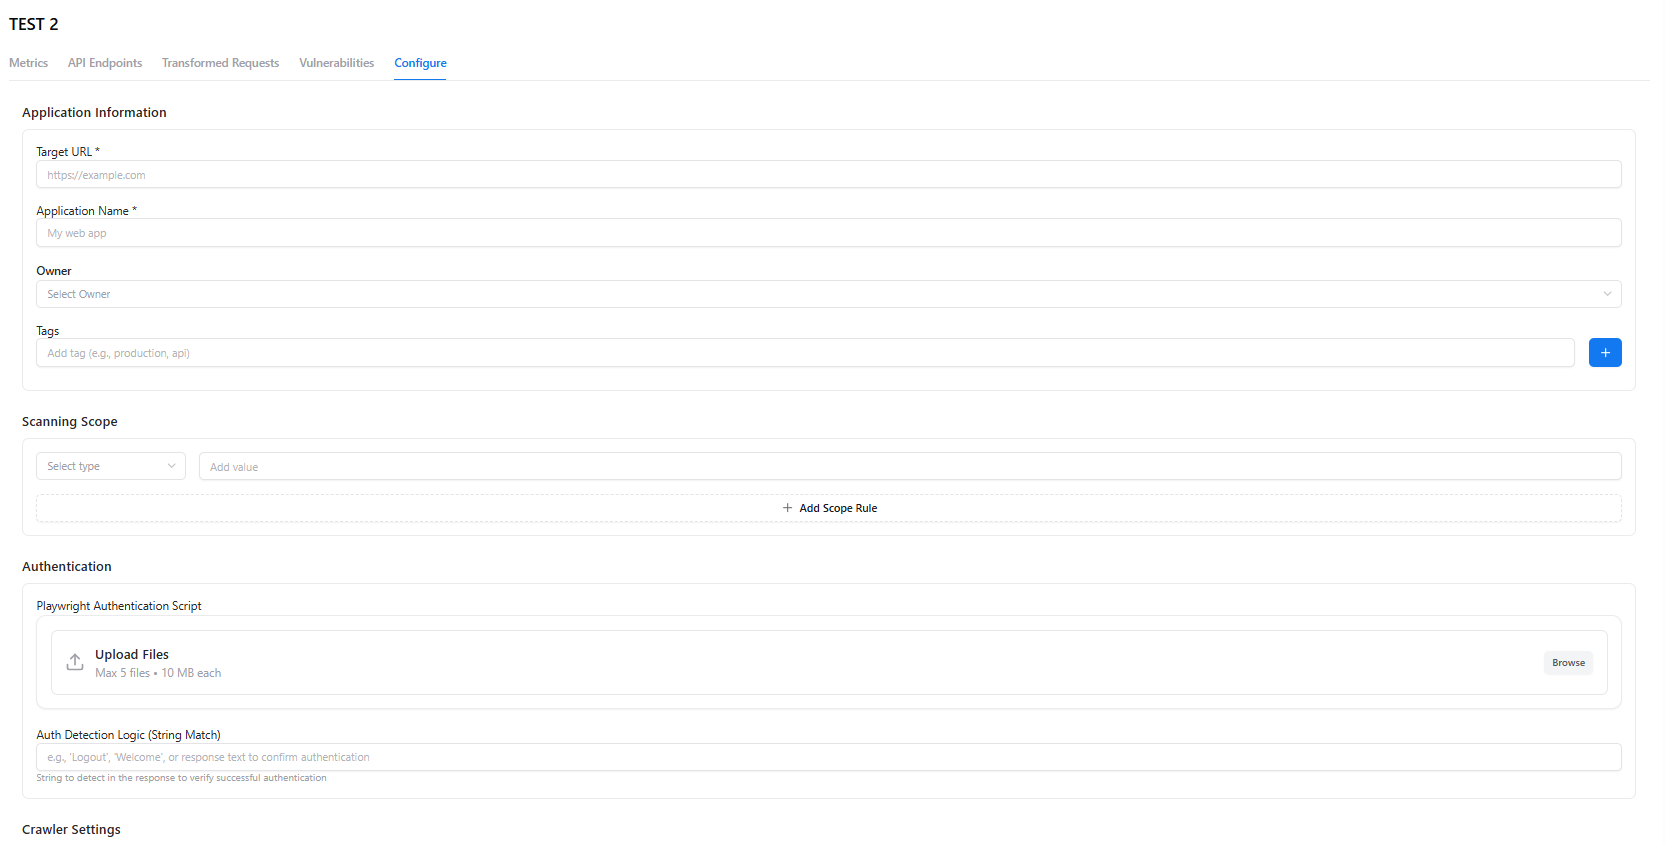
Application Information
- Target URL
- Application Name
- Owner
- Tags
Scanning Scope
Add scope rules limiting what the scanner tests.Authentication
- Upload Playwright authentication scripts
- Add success-detection logic (string match)
Crawler Settings
Choose between:- Aggressive mode
- Intelligent (AI-powered) mode
Crawler Rules & Webhook Settings
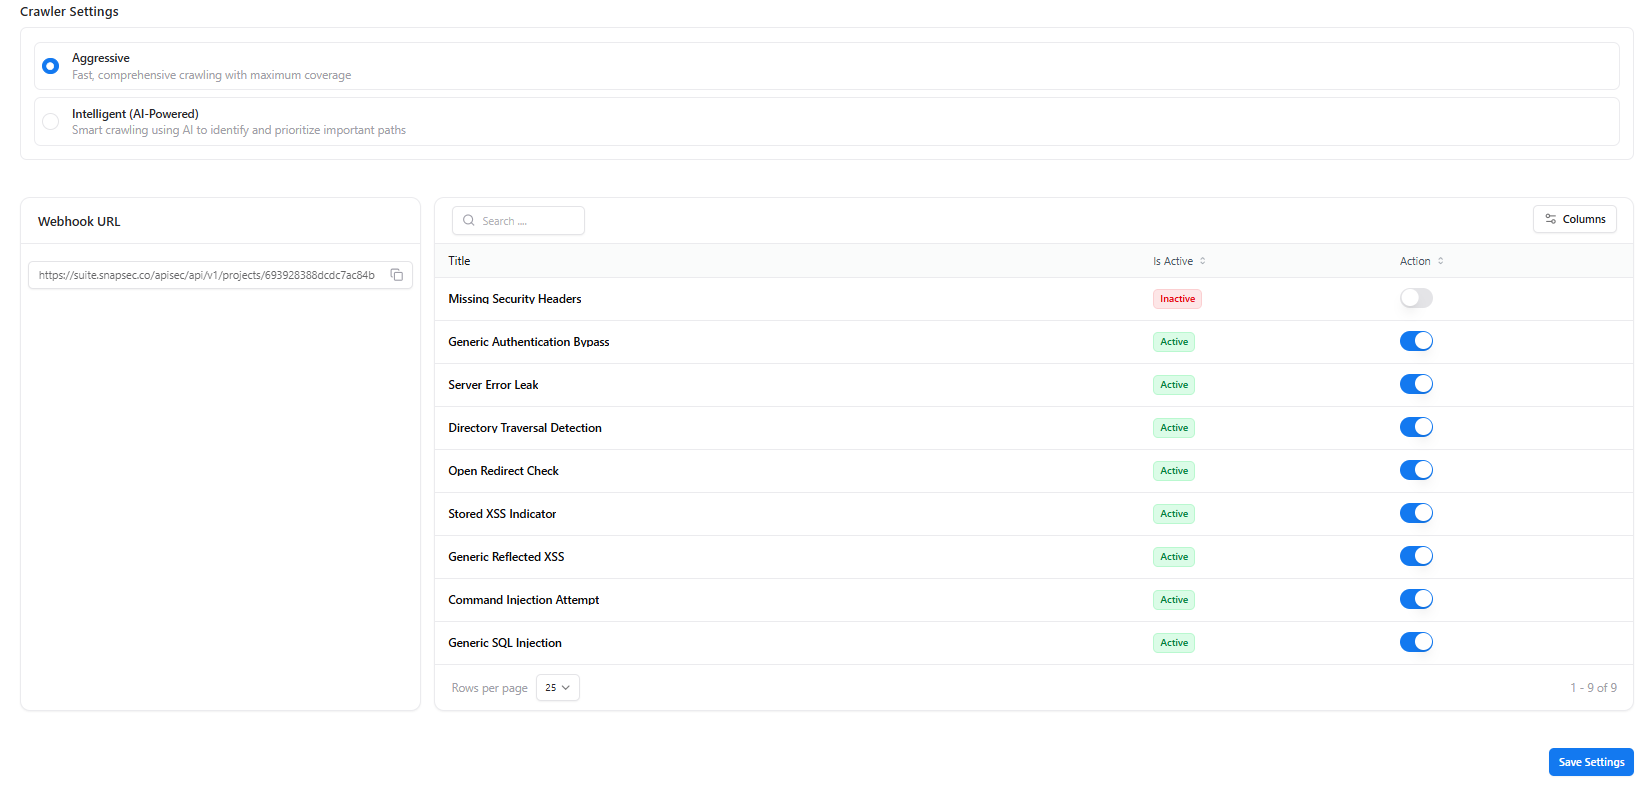
- Webhook URL for receiving vulnerability notifications
- Rule activation toggles for specific checks:
- Missing Security Headers
- Authentication Bypass
- Server Error Leak
- Directory Traversal
- XSS Indicators
- Command Injection
- SQL Injection
- And more…
Next Steps
View Vulnerabilities
Explore project-specific vulnerability findings and remediation details.
Manage Scanners
Connect or configure a scanner instance for automated scanning.
Explore Live Demo
Explore Snapsec Live — No Signup Needed
Jump straight into the live environment and see how Snapsec unifies asset intelligence, threat detection, and vulnerability tracking — all in one dashboard.