

Tenable Nessus Integration
Connect your Tenable Nessus instance to Snapsec VM to bring vulnerability findings into a centralized assessment and remediation workflow.Install Tenable Nessus
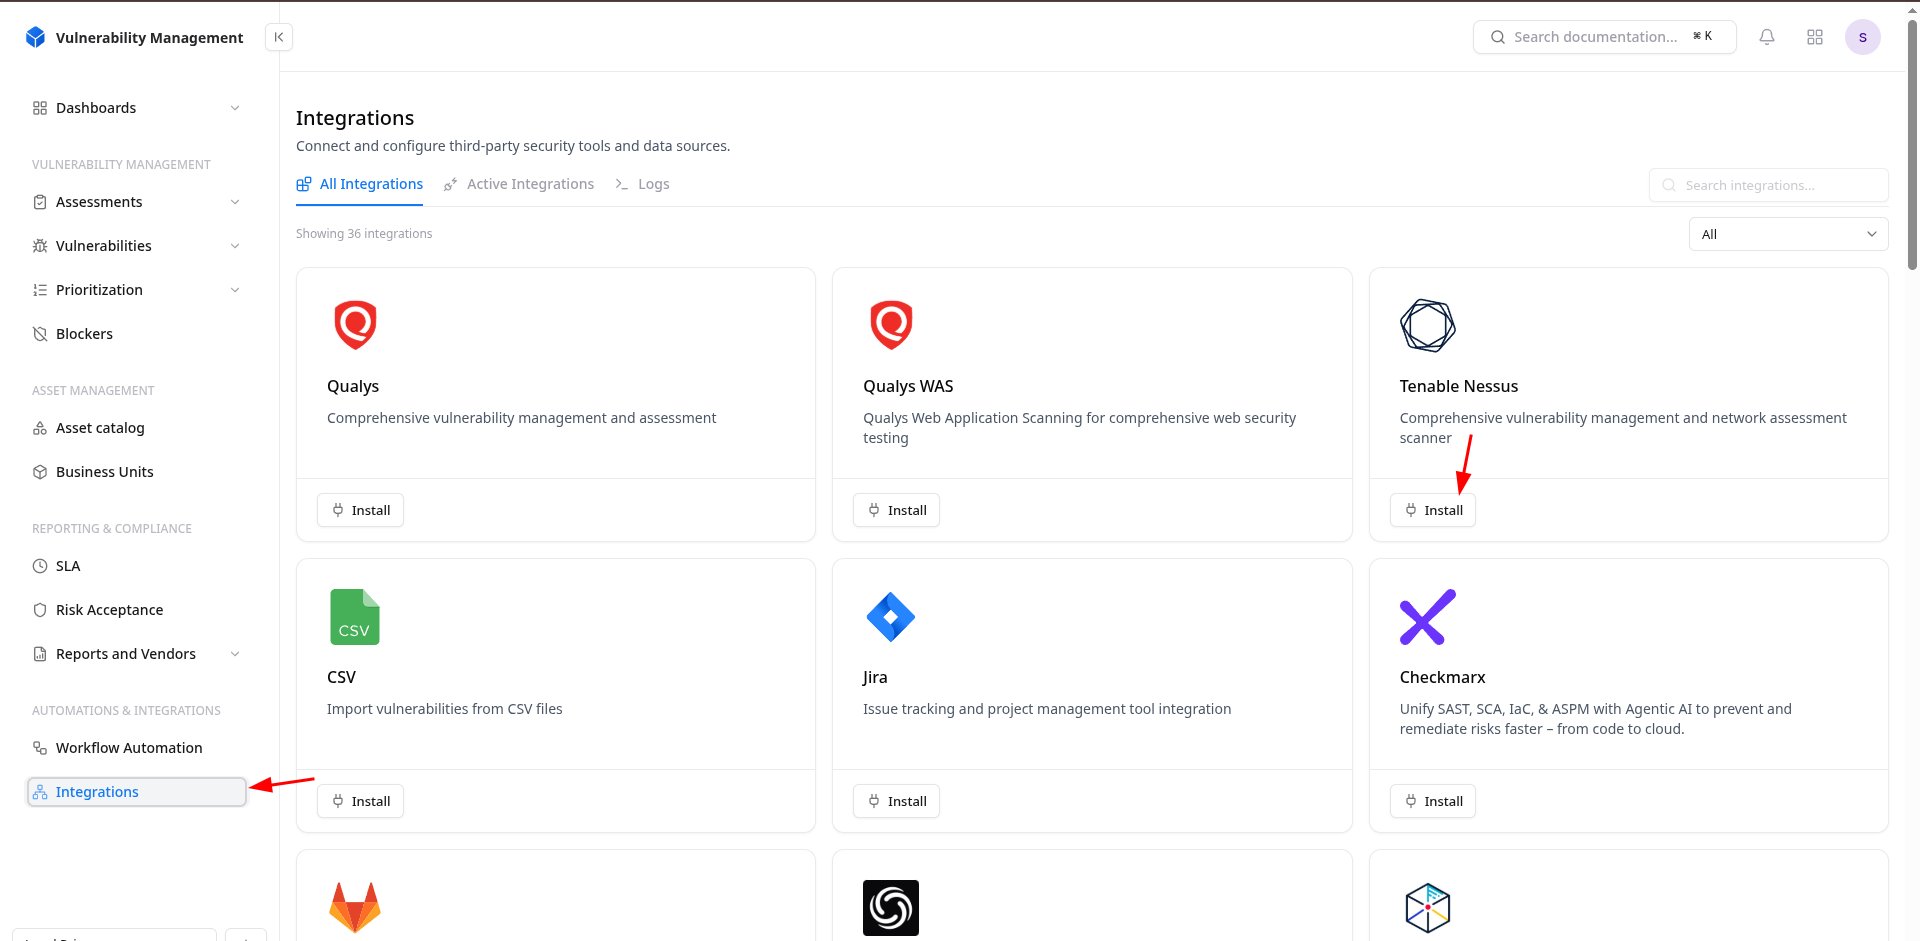
Install Tenable Nessus from the Snapsec VM Integrations page
- Open Integrations in Snapsec VM.
- Locate Tenable Nessus.
- Click Install.
Configure the Integration
The Tenable Nessus integration requires the following details:Get the Nessus API Credentials
Open My Account
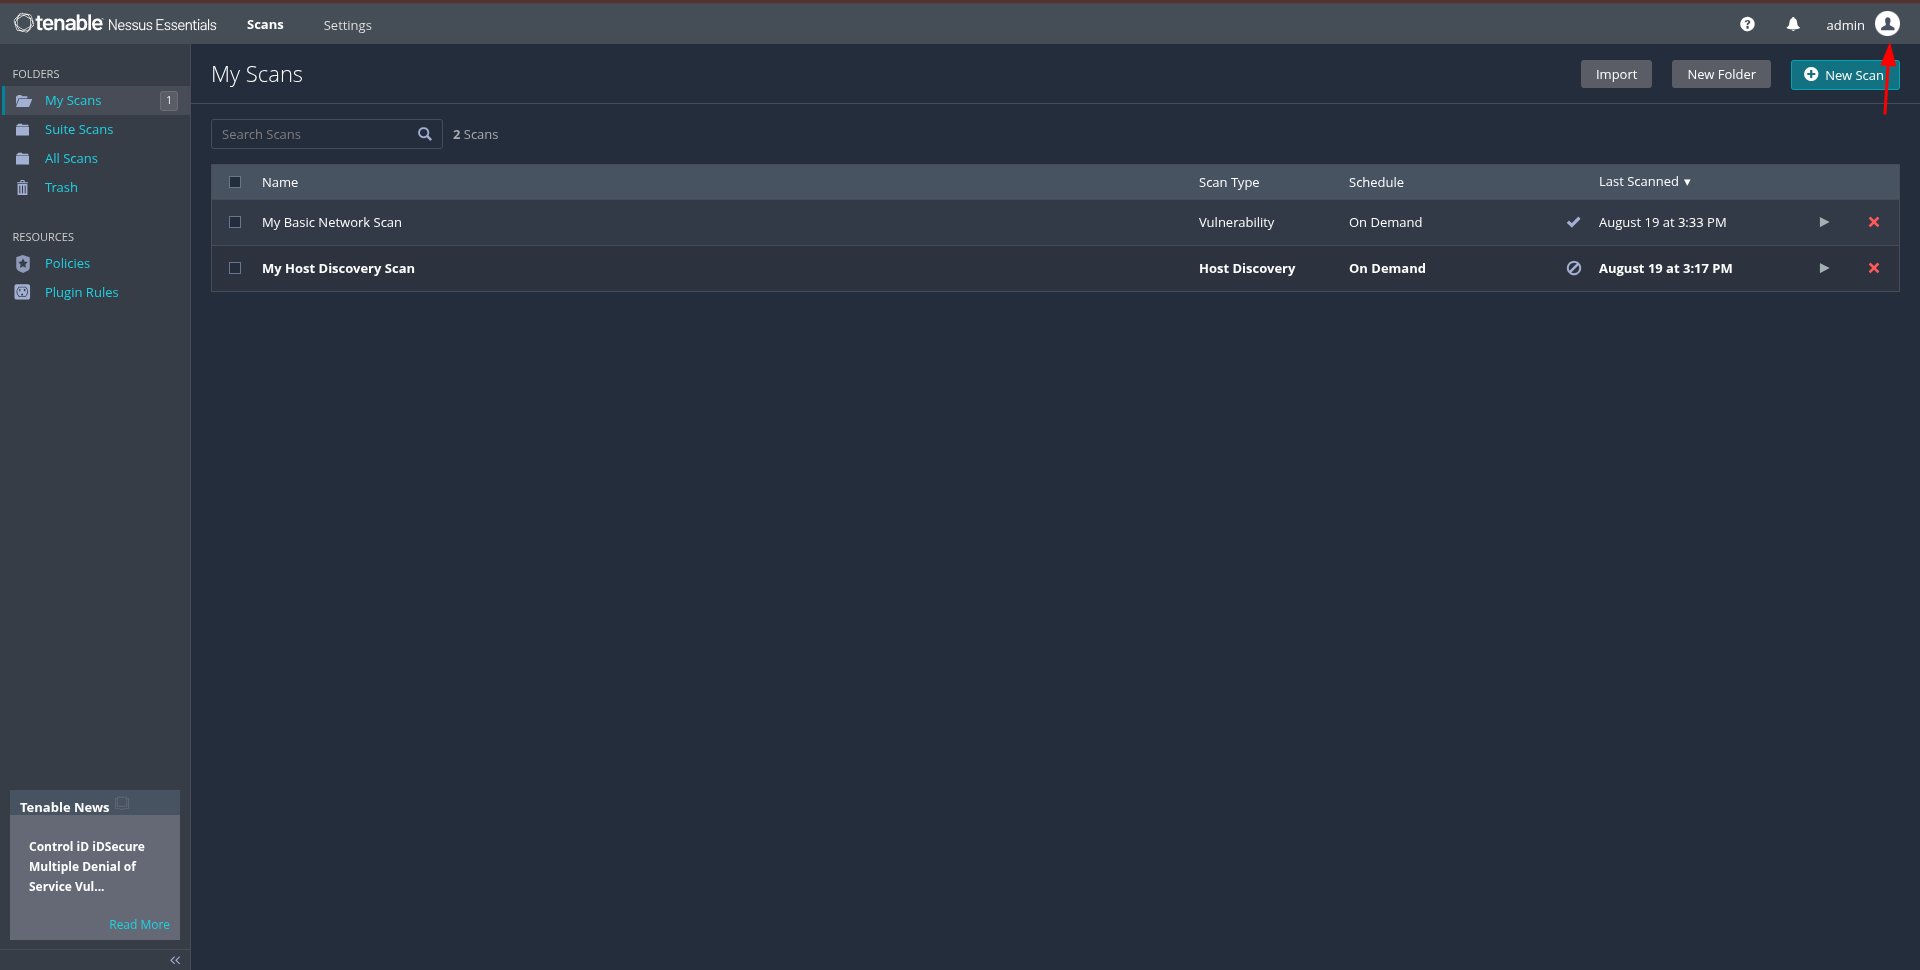
Open My Account from the Tenable Nessus user menu
Generate API Keys
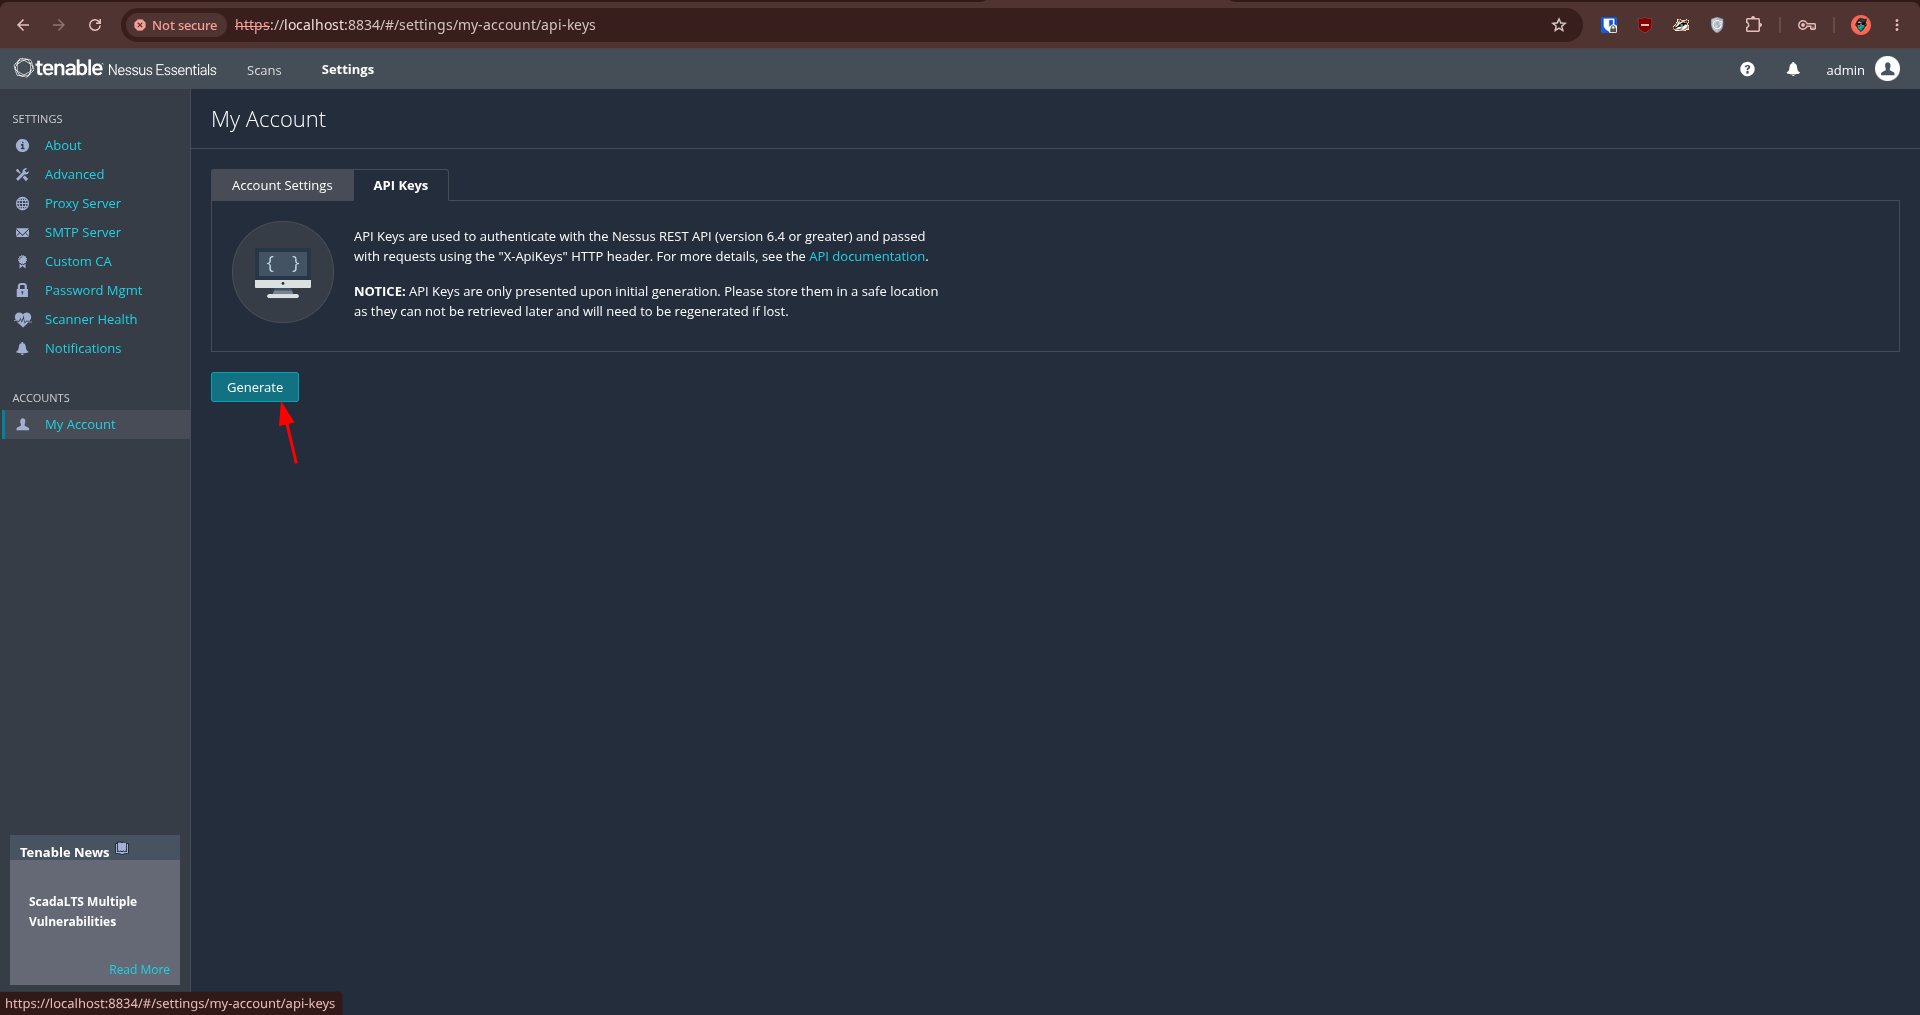
Generate API keys from the API Keys tab
Store the generated API credentials securely. They are required to authenticate Snapsec with your Nessus instance.
Check Integration Logs
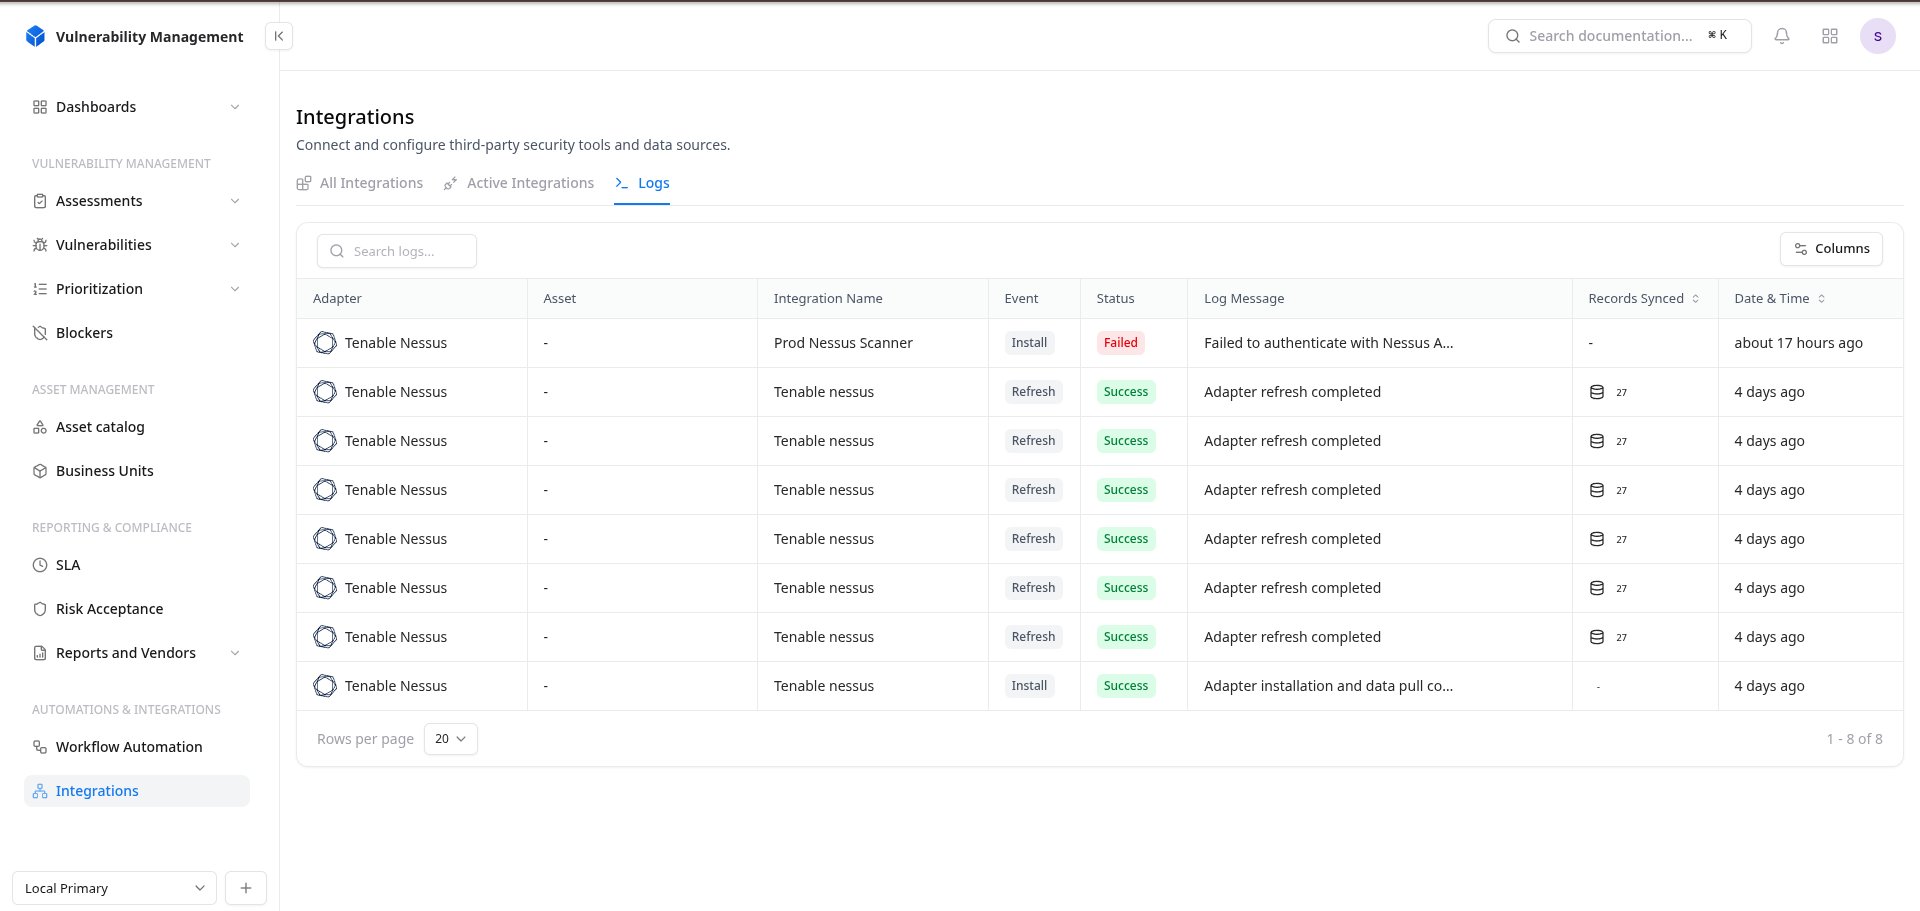
Review Tenable Nessus integration logs and synchronized records
Explore Live Demo
Explore Tenable Nessus in Action — No Signup Needed
See how Snapsec connects vulnerability scanners with centralized vulnerability management and remediation workflows.